

read time = 4 minutes
Summary
This is the second in a series of posts exploring fundamental malware analysis techniques. Please check out Part 1 for some additional background,.
The following techniques are presented as an alternative to automated sandboxing, which are effective and powerful tools. However, as we showed in Part 1, they may fail to capture all indicators in certain configurations with particular malware variants. Here, we will focus on the command and control (C&C) links for stage 1 downloads in documents that have been weaponized with encoded macros. We will use the same sample examined in the previous entry.
Emotet is used as the sample. SHA 256: 7cfe21d4f6b90c3ea7be27fef6dfc2f6f1cc5c41d5488ffbf1a14e9f43f19bc4
Background — Dynamic Analysis Techniques
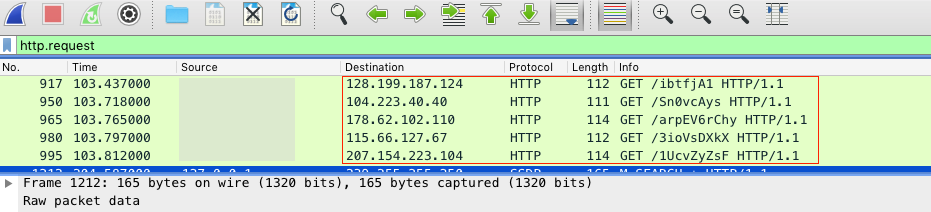
The Emotet document loader contains 5 hardcoded URLs in the macro. Our goal will be to extract all 5 of these indicators. In an incident response engagement, it is critical to leverage a method that is both fast, and also delivers comprehensive IOCs so that evidence of execution can be captured or ruled out.

In part 1, we compared and contrasted analysis results from an automated sandbox and FakeNet-NG –a network analysis tool developed by FireEye as a part of their FLARE reverse engineering project. A brief overview can be found here, and the tool itself can be downloaded from FLARE’s official GitHub repository here.
Despite the success of this previous technique, we will continue to look at alternative methods to achieve similar results. There are several reasons for exploring additional options. First, it is always better to be prepared with alternatives if a tool stops functioning or there is some other unexpected analysis blocker. It is simply better to know more than one way to do a thing. Second, FakeNet only provides Network Indicators, and we would prefer additional context with other host-based artifacts. Finally, additional analysis techniques can offer deeper insight into malware operations so that we can do more than just recover artifacts and atomic indicators. The intelligence gained from a more detailed analysis can help us develop detection strategies to detect and disrupt future campaigns.
Option #2 — Process Monitor
The next technique to cover is using the powerful Process Monitor aka ProcMon — a system utility that is part of the Windows Sysinternals suite. We won’t dig too deep into these tools’ capabilities as we could devote an entire series to them and merely scratch the surface. At its core though, Process Monitor is a monitoring tool that captures host activity for the Windows file system and processes/threads in real time. For our purposes here, we can leverage ProcMon’s capture of process activity to extract the URLs from the PowerShell script executed by the CMD process. Here’s how we do it:
- Run Process Monitor
- Open Document and Enable Macro content
- Filter Process Monitor events and extract PowerShell
Please keep in mind that this process infects the victim host, so restoration from a backup or snapshot will be necessary following these steps. If you are running a virtual machine, as an added safety precaution you can disconnect the NIC so that the malware cannot reach out to the internet.
After running ProcMon and just before opening the file, you should clear the events. This will help remove some noise and is a good practice to limit the size of the capture file.
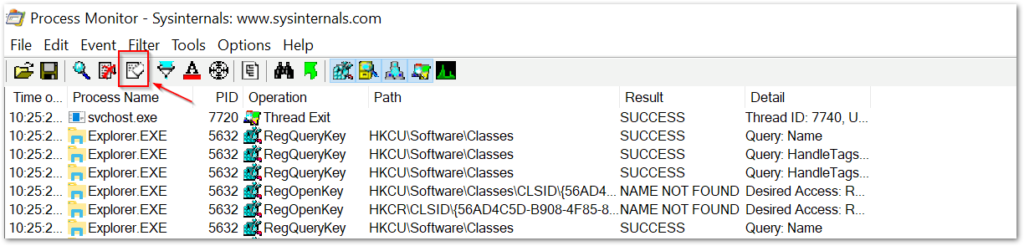
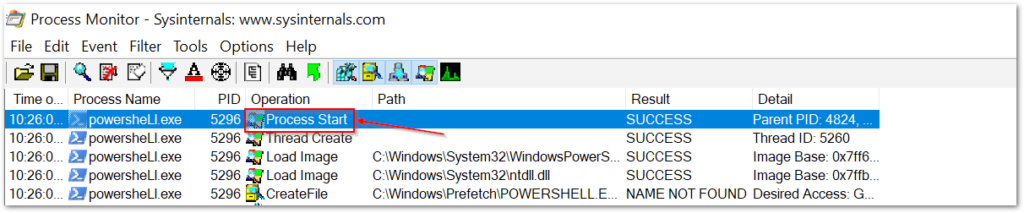
the next step is to open the document and enable content. Once the malicious content has run, jump back to ProcMon and we will need to filter events (there will be a lot) to make the PowerShell process easier to find.
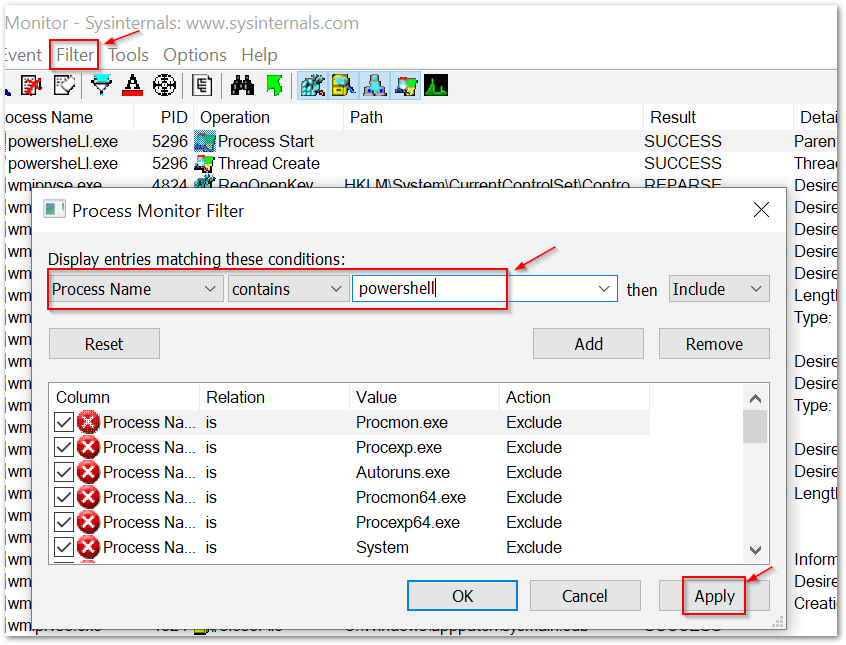
By filtering for the process name, we will want to drill down into the PowerShell event “Process Start.” This should be the first PowerShell process started after execution of Word.
By drilling down into the process start event, we get the event properties. Select the “Process” tab and the PowerShell command executed by the process will be revealed.
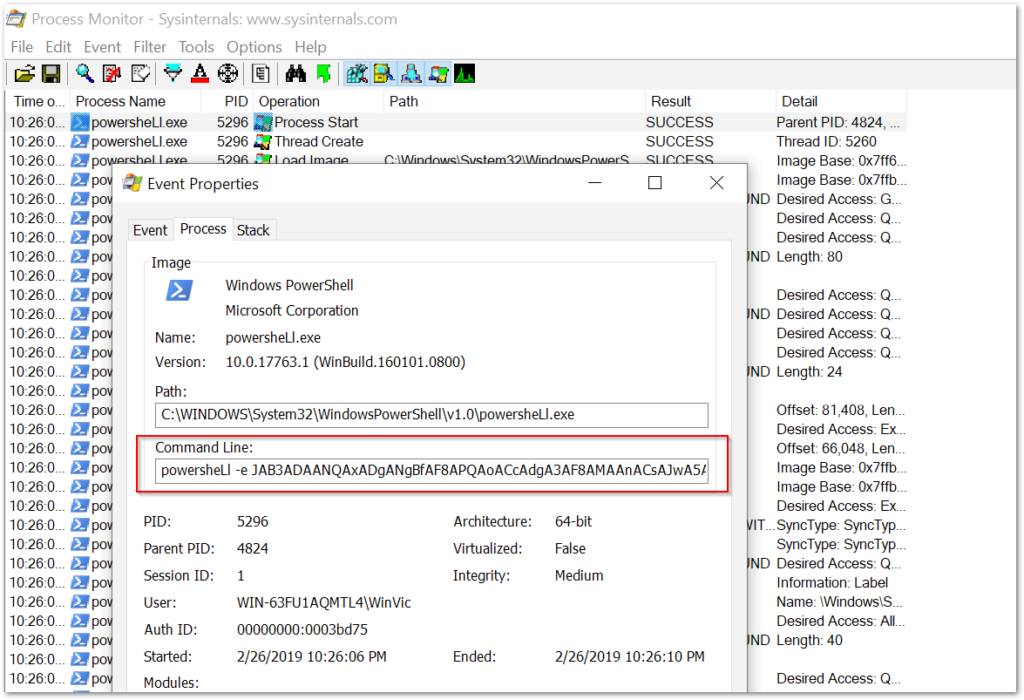
As we can see, the PowerShell itself is an obfuscated base64 encoded string. We will need to decode the string and the macro it reveals. But before we get to the decoding, we will take a look at an alternative method to capture the PowerShell script.
Option #3 — CMD Watcher
A nice tool called CMD Watcher from Kahu Security will allow an analyst to capture the PowerShell script much faster and also avoid infecting the lab system. CMD Watcher is a light application that runs in the background and “watches” for the CMD and PowerShell processes, captures the loaded code, and optionally prevents the processes from being executed. Let’s take a look:
First, we will need to start CMD Watcher and ensure options are set as desired.
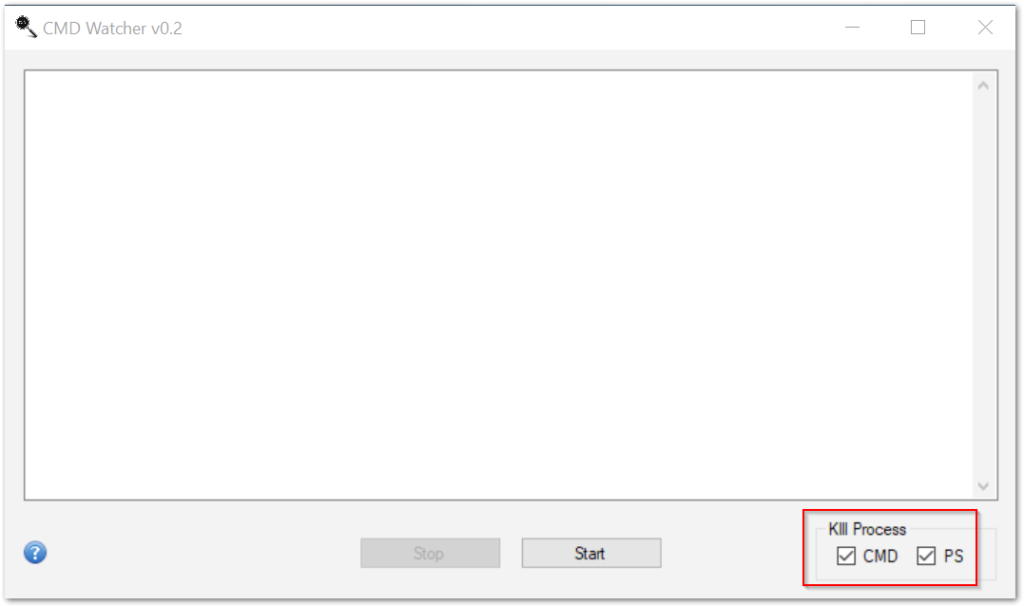
We should leave both the CMD and PS selected. This will make sure that any process from either cmd.exe or powershell.exe will be killed. This method does not infect the system, but for those who are especially cautious, running network or host monitors such as fiddler or procmon in the background can provide an additional assurance.
When CMD Watcher is running, the maldoc can be opened and macros enabled. Jumping back into the program, we see the output from any CMD or PowerShell process.
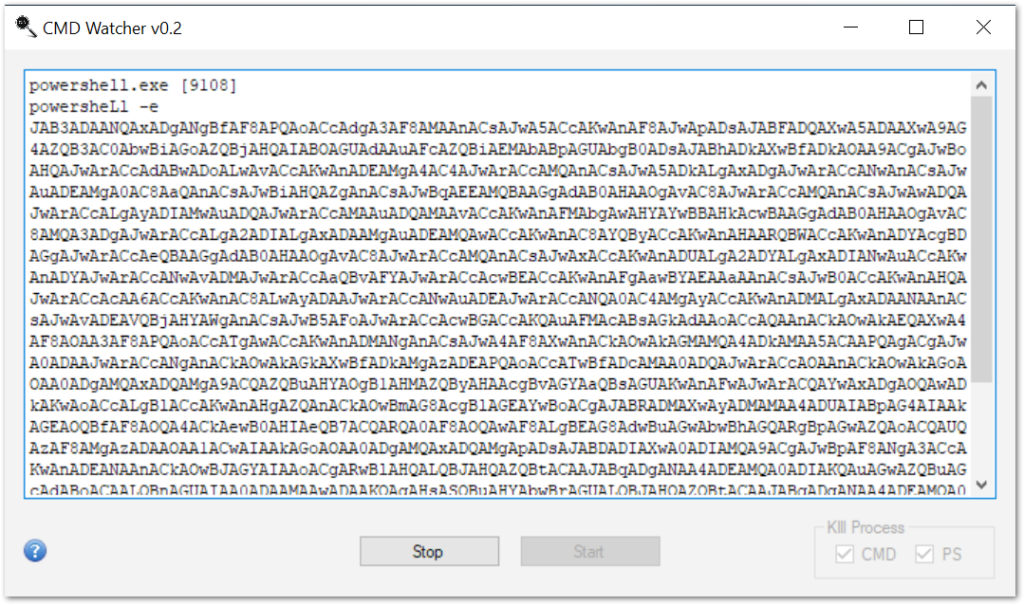
Here, we see a captured PowerShell script, but it is completely unintelligible due to being encoded in base64. To de-obfuscate the script, we will need to pivot to another tool. At this point in the analysis, the data gathered either from Process Monitor and CMD watcher is the same encoded string. It is simply two differing methods to achieve the same result.
Option #4 — CyberChef
CyberChef is a powerful web application that offers a wide variety of tools to assist with a multitude of different data analysis tasks. It is one of my favorite tools and one that should be a part of any analyst tool-kit. For our applications here, we can use CyberChef to cook a “recipe” that will allow us to decode the obfuscated PowerShell script. Here’s how we do it:
Simply copy and drop the script into the CyberChef’s “input” window.

There are 4 windows in the application view. Input and Output are on the right. The Left Operations window contains all of the data analysis tools and operations available to be used against the input. The middle window is the Recipe, where we can build our ingredients from the operations options to get our desired output. In this case, the obfuscation is not very complicated compared to more common versions of Emotet that often include multiple levels of obfuscation with environment variables, arrays, string reversals, inflation/deflation, DOSfuscation techniques, and more.
Here, we we mainly just need to decode the base64, remove some “.” character obfuscation and generally clean up the code to make the URLs obvious.
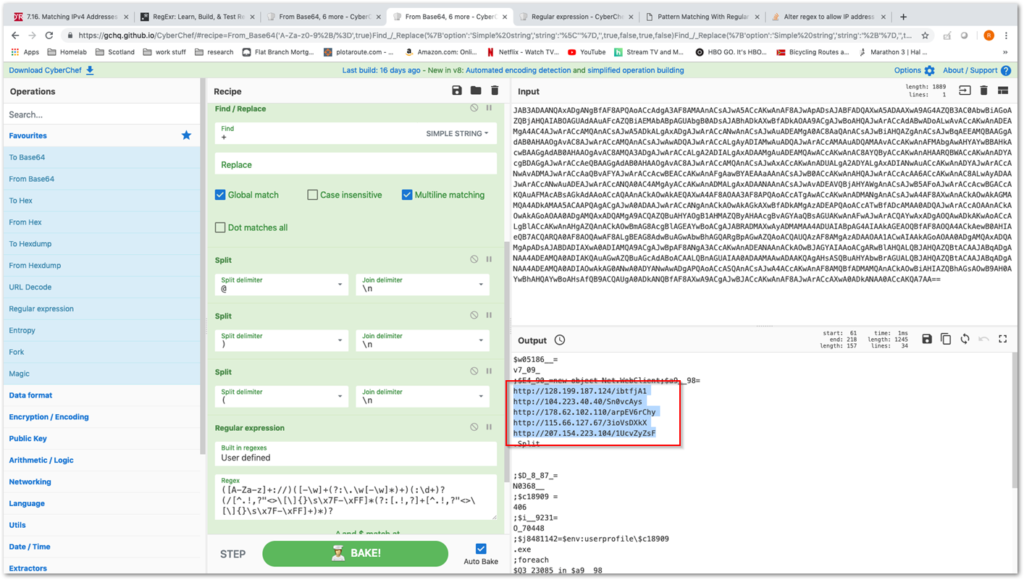
The specific recipe to decode scripts such as these will change frequently as malware is often updated in a rapid cadence. This technique may require some tinkering to get to work correctly in some situations, but that is a reflection of the shifting threat environment, not an indictment of the tool. For what it’s worth, this is the recipe we used for this particular sample:
*probably outdated by the time of this writing
From_Base64(‘A-Za-z0-9+/=’,true)
Find_/_Replace({‘option’:’Simple string’,’string’:’\”},”,true,false,true,false)
Find_/_Replace({‘option’:’Simple string’,’string’:’+’},”,true,false,true,false)
Split(‘@’,’\\n’)
Split(‘)’,’\\n’)
Split(‘(‘,’\\n’)
Regular_expression(‘User defined’,'([A-Za-z]+://)([-\\w]+(?:\\.\\w[-\\w]*)+)(:\\d+)?(/[^.!,?”<>\\[\\]{}\\s\\x7F-\\xFF]*(?:[.!,?]+[^.!,?”<>\\[\\]{}\\s\\x7F-\\xFF]+)*)?’,true,true,true,false,true,false,’Highlight matches’)
So that’s it for Part 2 of extracting indicators from maldoc macros. In this edition we pulled the encoded PowerShell script using both Process Monitor and CMD Watcher to the same effect. We briefly introduced the awesome CyberChef and highlighted some of its core capabilities to expedite malware and data analysis. These methods were even slower than the techniques demonstrated in Part 1, but we did capture all of the desired URL indicators along with some additional contextual artifacts such as the full PowerShell script as well as host artifacts like process and thread data. In the next part, we will escalate to even slower and more complicated static analysis by examining raw VBA macros and decoding the malware script dumped directly from the document.
Tbh it’s easier to extract the VBA code using olevba from decalage oletools and then deobfuscate it with ViperMonkey from decalage too lol. Lastest samples have a high amount of trash code that simply consume alot of resources from ViperMonkey so use the -s flag to do it like 5 times faster
Thank you for the feedback. I will check out the method you describe and post a follow-up with the results.